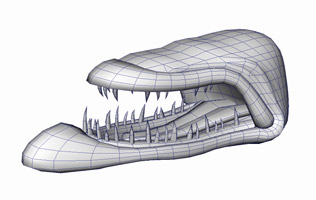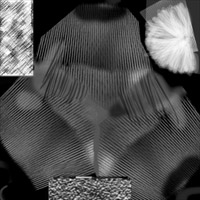


This is a small sample of the Creature Rigblocks I created. I would be given a simple pencil sketch of what the rigblock should look like, and then I would proceed to model and UV them. I used a pelting shareware to layout mostly unique UVs for the rigblocks.
After a model review, the rigblock would then be rigged or and set to deform with joints and/or blendshapes. Simple animation clips (such as OpenClose for the mouths and Pointing for graspers) would be added at this point as well as the deforming handles. There is a strict naming convention governing the animation clips, since the procedural animation system uses the clip names to drive a crafted animation through ALL creature parts with the same clipname.
Texturing has no dependency with the rigging/deforming and thus could be done in parallel by another artist if the schedule got tight.dles. There is a strict naming convention governing the animation clips, since the procedural animation system uses the clip names to drive a crafted animation through ALL creature parts with the same clipname. The texture file would be explained in the next section in more detail.
The texturing of rigblocks is a complicated process since the hand authored texture layers are then blended with the engine SKIN PAINT system to produce the final result.
Our textures are kept in PSD format, and consists of 8 to 9 extra channels. There is a strict naming convention of the channels since it governs how the layers are exported by our asset exporter.
The diffuse alpha mask controls how much of the diffuse component of the procedural skinpaint (picked by the player) will blend in with the hand authored texture. The spec and bump mask controls the blending of the respective components with the skinpaint as well.
The tint layers control how much USER-picked color will be hue-shifted on the diffuse texture. The player has control of 3 colors, and thus we have three tint layers for each color.
For more information on how the Skinpaint system worked, visit Ocean’s post.


